
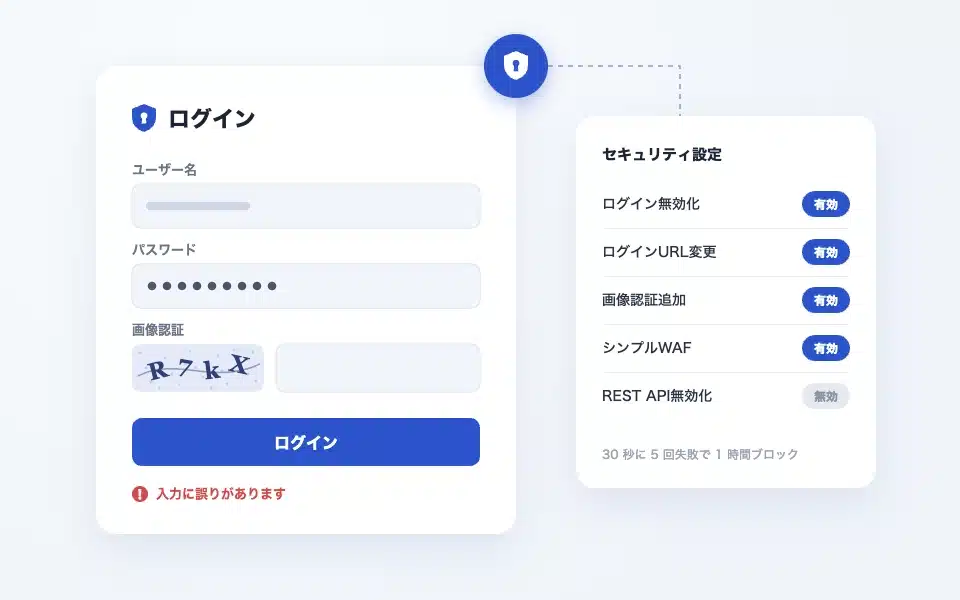
This site (shitate the official site) uses plugins to provide security measures. CloudSecure WP Security I am using XServers, a domestically produced plug-in that is provided free of charge by the company. It has all the necessary measures in place to prevent unauthorized access to the login screen and management screen.
Here, along with the actual settings screen,How the functions are configuredAnd,Why are they doing that?We will summarize the features. Detailed descriptions of each feature can be found in the explanatory article provided by the original source:Explains the benefits and how to set up CloudSecure WP Security(Xserver) is easy to understand, so please read it in conjunction with this article.
* As of October 2026.
Overview of the settings
In the "CloudSecure WP Security" menu in the admin panel, go to "Dashboard" to see a list of features that can be turned on or off. The feature labeled "Enabled" is the one that is turned on.
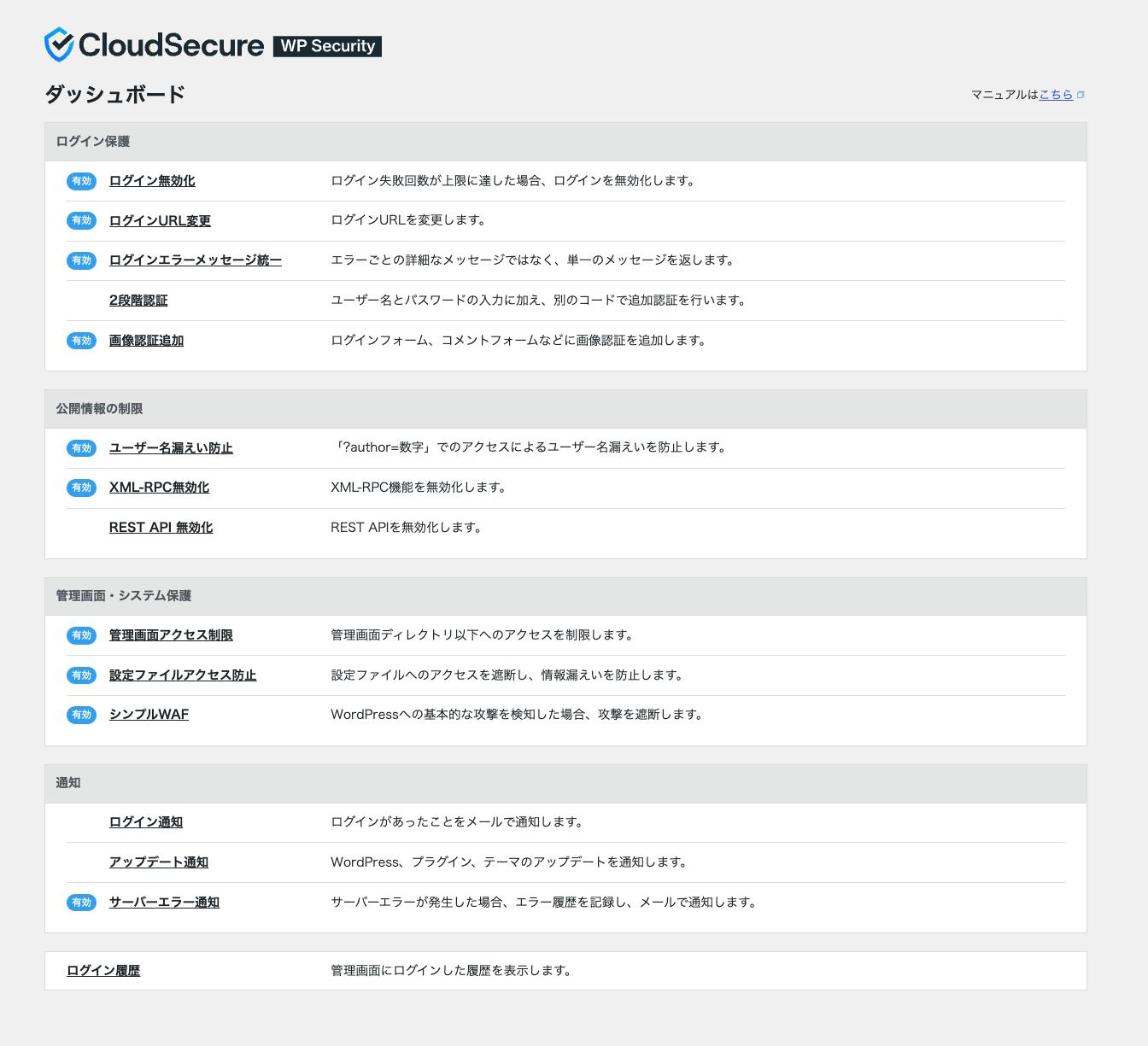
In a nutshell, the settings and the reasons for doing so are as follows:
| Features | Settings for this site | Reason |
|---|---|---|
| Log out of your account | Enabled (3600 seconds block with 5 failures within 30 seconds) | Stop prolonged all-out attacks |
| Change login URL | Enabled | Make it difficult for someone to know where the login screen is located |
| Unified login error message | Enabled (initial value) | Do not let users know if their names are correct or not |
| Two-factor authentication | Disabled | After implementing additional measures at the entrance, we prioritized the ease of logging in. |
| Add image verification | Enabled (4 for all forms) | Prevent automatic transmission by bots |
| Preventing username leakage | Enabled (initial value) | Hides the username used for logging in |
| Disable XML-RPC | Enabled (pinback disabled) | Preventing the abuse of pinbacks |
| Disabling the REST API | Disabled | Because the block editor works with the REST API |
| Admin panel access restrictions | Enabled | Do not show the entire management screen to unfamiliar connections |
| Preventing access to configuration files | Enabled (initial value) | Prevent the leakage of the contents of the configuration file |
| Simple WAF | Enabled (blocks XSS) | Blocks typical attacks. XSS is removed because it is often incorrectly detected. |
| Login notification | Disabled | Because notifications are hidden when logging in daily |
| Update notification | Disabled | The update is checked in the management screen. |
| Server error notification | Enabled | To detect problems sooner |
Login protection
Log out of your account
If you fail to log in within the specified time limit, this feature blocks login attempts from that source for a certain period of time. It is a basic measure against brute force attacks, where you try every password in turn.
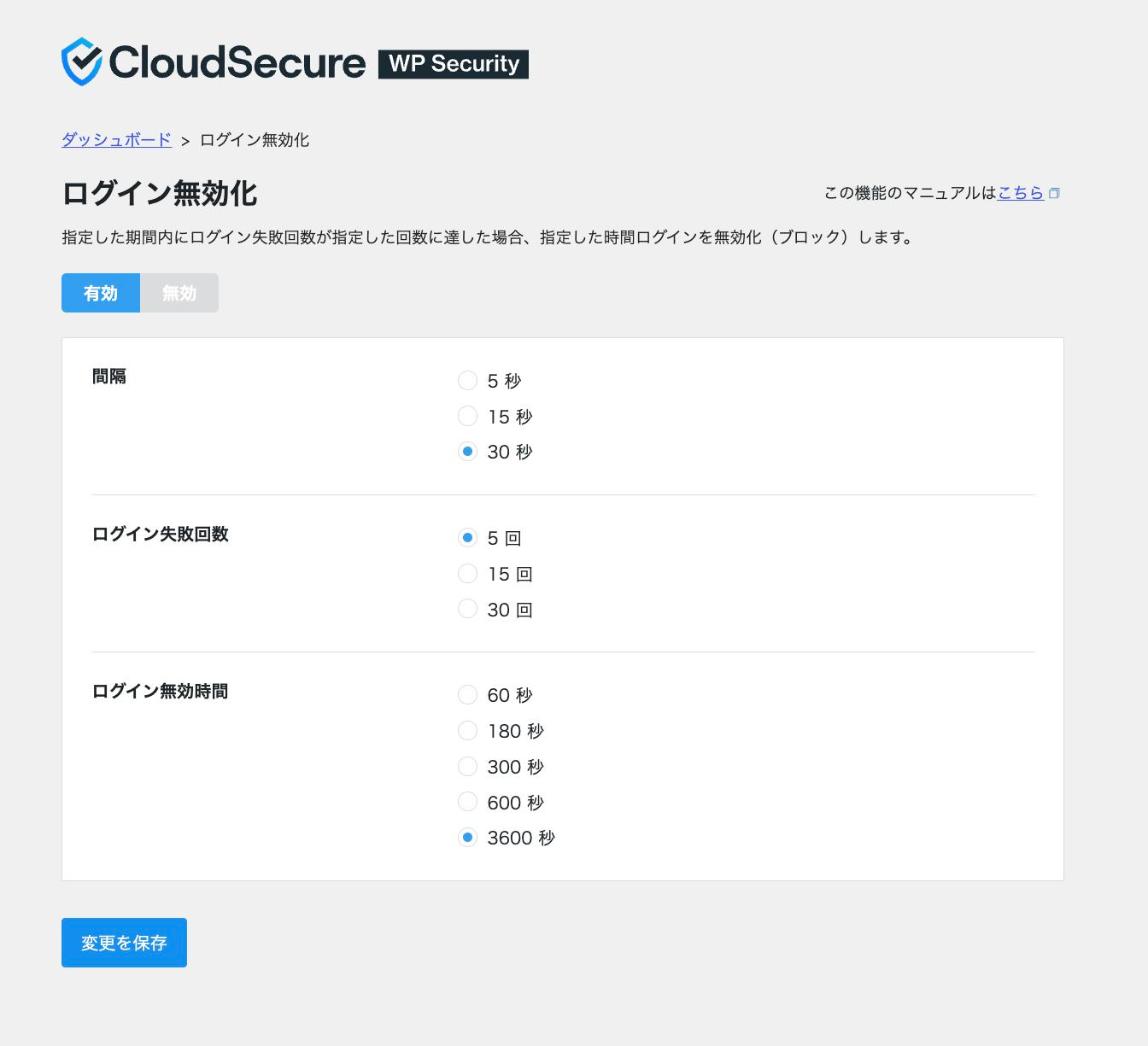
- Interval:30 seconds(Initial value is 5 seconds)
- Number of failed logins:5 times(Remain at the initial value)
- Login disabled time:3600 seconds (1 hour)(Initial value is 60 seconds)
The initial value of "5 times in 5 seconds" works well for bots that try to attack at incredibly fast speeds, but attacks that try to attack with a slight delay are able to get through. Therefore, we have expanded the interval for judging to 30 seconds, and if they block it, they cannot try again for an hour.
That said, they will also be locked out for an hour if I keep typing the password incorrectly. This site uses login URL changes and screen access restrictions to make it difficult for attackers to get to the login screen in the first place, so the idea is to be “strict with those who get through.”
Change login URL
The WordPress login screen is public by default. /wp-login.php This feature makes the login screen URL less likely to be guessed.
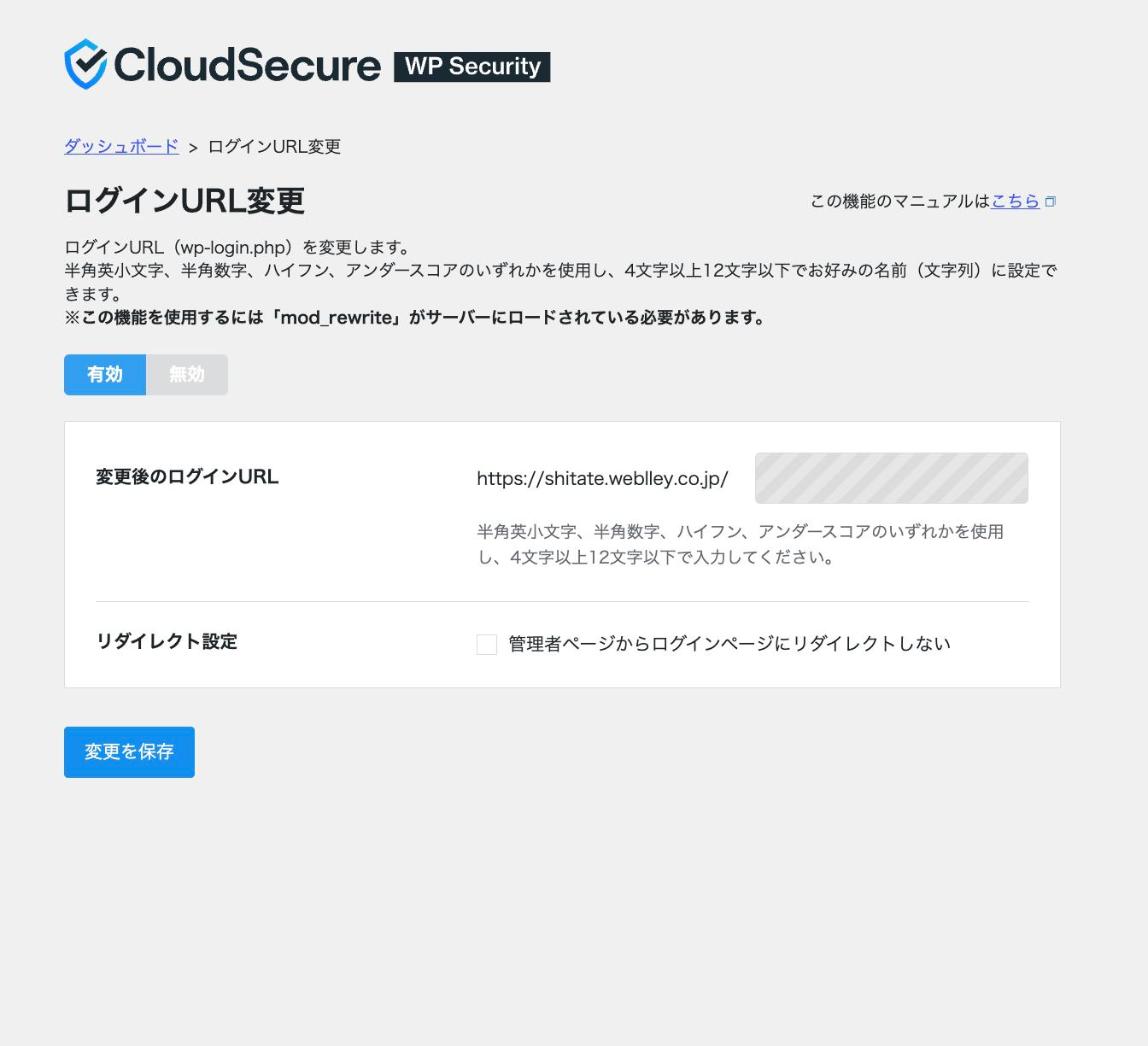
Avoid easily guessed strings like "login" and "admin". If you forget the changed URL, you won't be able to log in; so bookmark it immediately after you change it (if you forget it, you can check it in the email you receive when you change it to the administrator).
The "Do not redirect to login page from admin page" checkbox has not been checked. This site has enabled the management screen access restriction described below, so connections that have not logged in for more than 24 hours will not be allowed. /wp-admin/ Even if you open it, it will still return a 404 error, and you won't be redirected to the login screen. Only the connection that you logged in to most recently will be redirected, so you won't be able to access it from the environment where you normally work. /wp-admin/ Just open it and you can go to the login screen.
If you don't use admin screen access restrictions, be sure to check this box. Otherwise,/wp-admin/ With forwarding from the source, anyone will know the changed login URL.
Unified login error message
When a login fails, WordPress displays different messages for each reason, such as "the username is not registered" and "the password is different." This makes it easy for attackers to determine whether the username matches, so we keep returning the same message (input error) for every failure. It remains valid with the default value.
Two-factor authentication
In addition to a password, this feature also authenticates you using a 6-digit code received via email or an authentication app (such as Google Authenticator). The explanation article strongly recommends enabling this feature; however, on this site it is currently turned off.
This is because they have made it difficult to reach the login screen by repeatedly changing the login URL, restricting access to the management screen, requiring image authentication, and disabling login, and have prioritized the ease of logging in each time.
However, two-factor authentication is a last line of defense in case your password gets leaked. We recommend keeping it enabled for sites that require multiple people to update, or for sites that hand over accounts to clients. To enable it, select the appropriate permission group (in this case, admin) and have each user set their own authentication method and recovery code using their own account.
Add image verification
This feature prevents you from moving forward unless you enter the text displayed in the image. It prevents bot-driven auto logins and automatic submission to forms. It is enabled for all four forms: login, comment, password reset, and user registration.
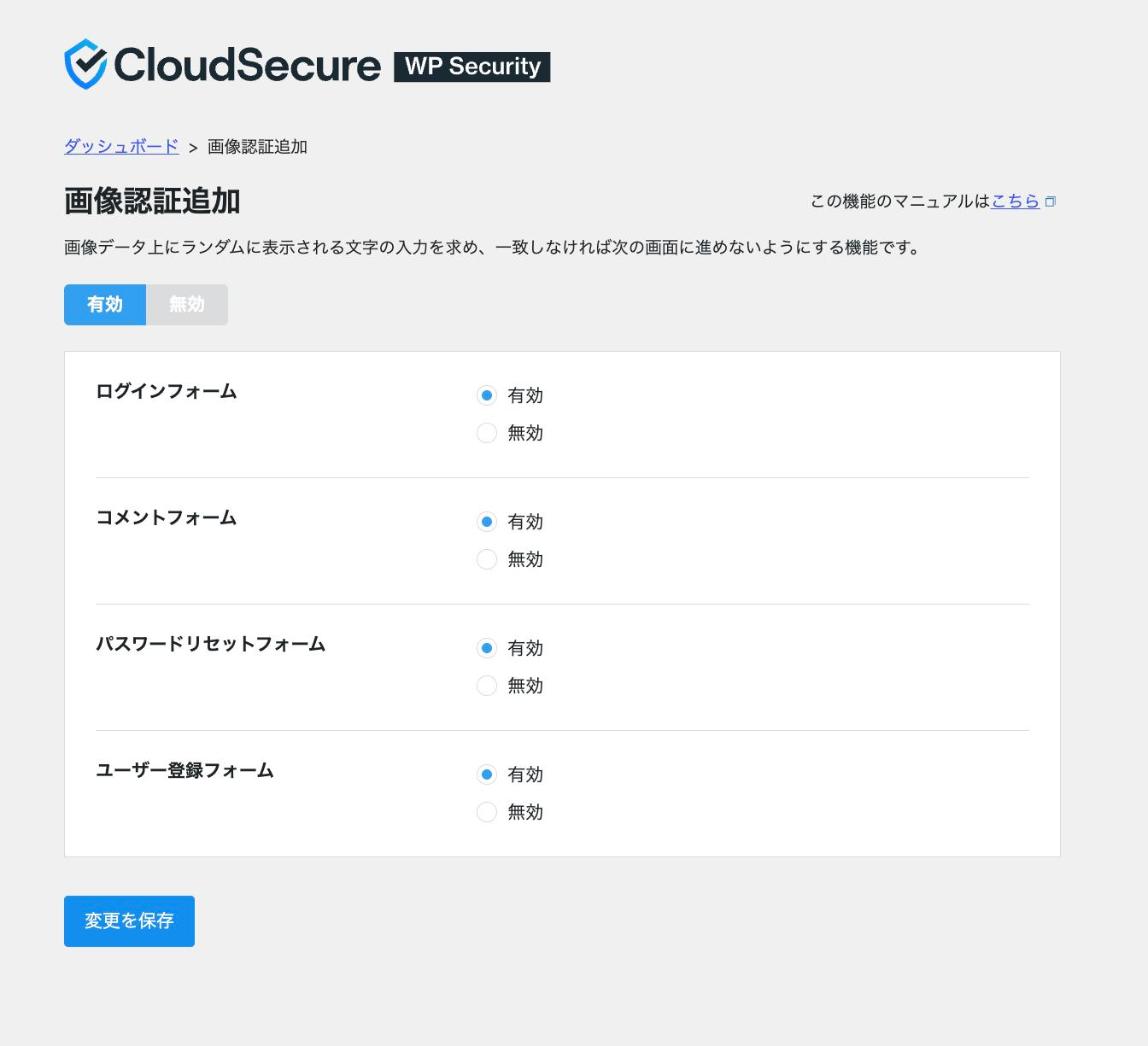
Even if you don’t use any forms, leaving them all turned on will prevent you from forgetting to use them later when you start using them. Additionally, if you add spam protection features like Cloudflare Turnstile to forms for inquiries, be sure not to overlap image authentication with the same form (as there may be a risk of conflict).
Restrictions on public information
Preventing username leakage
By default, WordPress is configured to:/?author=1 When you access a URL like this, you are redirected to the author archive, and the user name for logging in appears there. This feature prevents such access from being sent to the error page and ensures that the user name is not known. It remains effective with its initial value.
In addition, it is recommended to set the "display name" of the contributor to a name different from the user name for added peace of mind.
Disable XML-RPC
XML-RPC is an old mechanism for operating WordPress from external apps and services. Pinback (notifications when linked from other sites) also uses this mechanism, and it can be exploited as a stepping stone for attacks that send out large numbers of requests.
On this site, we have disabled the "pinback disabled" option, so only pinbacks are being blocked. If you choose "XML-RPC disabled" on the other option, all of XML-RPC will be disabled, and you will also be unable to log in via XML-RPC. Instead, tools that use XML-RPC, such as Jetpack and the WordPress mobile app, will not work. If you don't use these integrations, you can also disable them all with "XML-RPC disabled."
Disabling the REST API
The REST API is a mechanism for reading and writing data from outside of WordPress. This feature is intended to prevent abuse; however, it is disabled on this site (the REST API remains available).
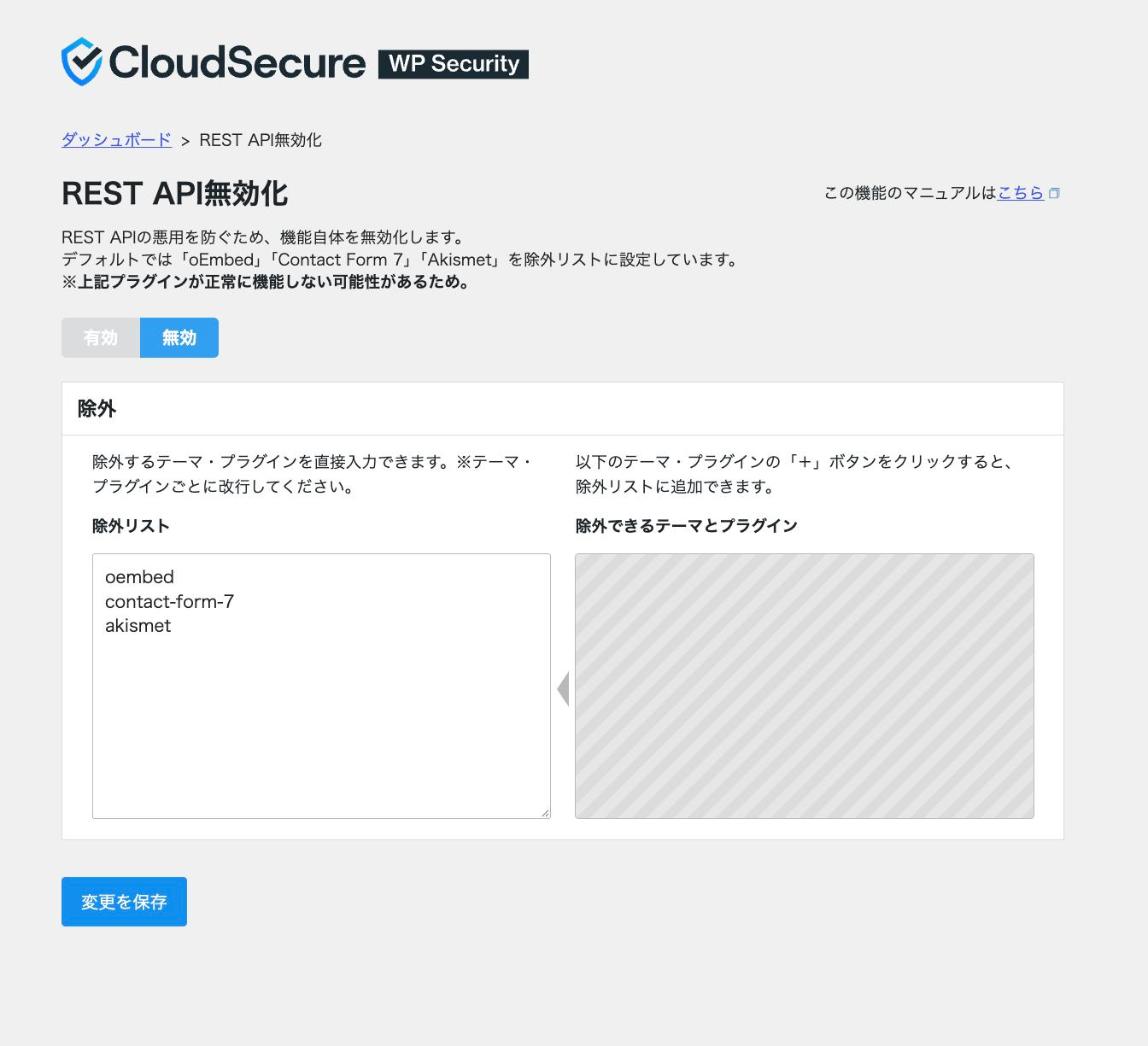
The Block Editor and Site Editor use the REST API to save articles and load templates.shitate Since it is a block theme, stopping the REST API will cause the editing screen to stop working properly. There are also many plugins that use the REST API, such as SEO plugins.
If you absolutely want to stop it, register the required themes and plugins in the exclusion list before enabling them, and then check that the editing screen and each plugin are working properly.
Admin panel and system protection
Admin panel access restrictions
From a connection IP address that hasn't logged in to the management screen for more than 24 hours /wp-admin/ This function returns a 404 error when accessed as follows. From an attacker's perspective, the management screen appears to not exist in the first place.
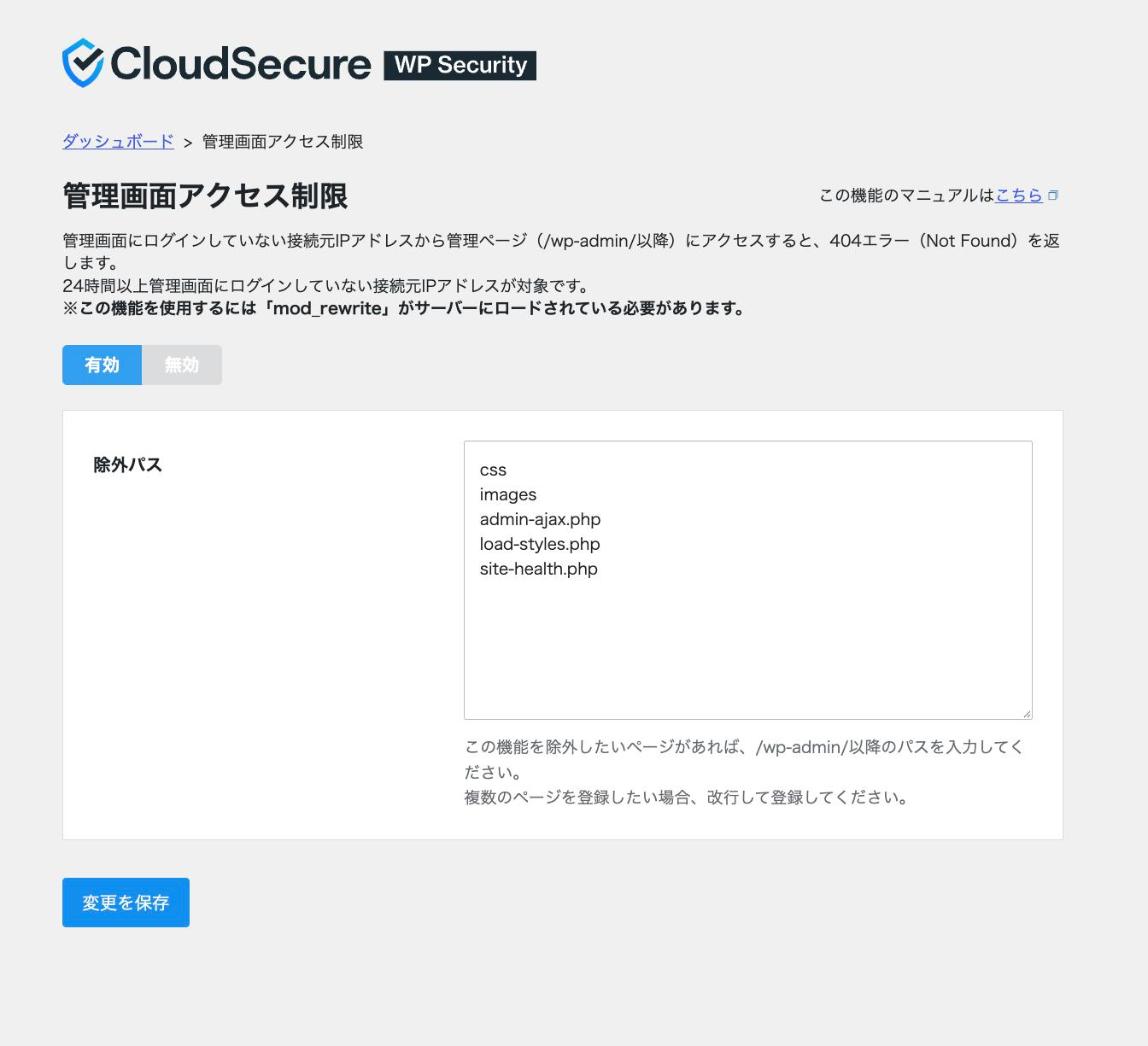
When combined with changing the login URL, this can create a situation where you don't know where to find the login screen or can't see the management screen, so we enable this feature on this site.
If you are using a line that is not a fixed IP or if you are working from a mobile location, you may need to log in again every time the IP address changes. It is best to decide whether to enable this based on whether you are willing to tolerate that hassle.
It is on the exclusion pass admin-ajax.php It is also called from the site's front-end functionality (such as form submission). Since the front-end functionality may stop working if it is excluded, leave it as is.
Preventing access to configuration files
wp-config.php や .htaccess For example, it blocks access to configuration files that are not intended to be opened directly from the browser with a 403 error. This feature prevents the leakage of database connection information, and it remains enabled with its default value.
Simple WAF
This feature detects typical WordPress attacks such as SQL injection and blocks access (403 error), records the detected history, and notifies administrators via email. The default setting is off, so it is enabled.
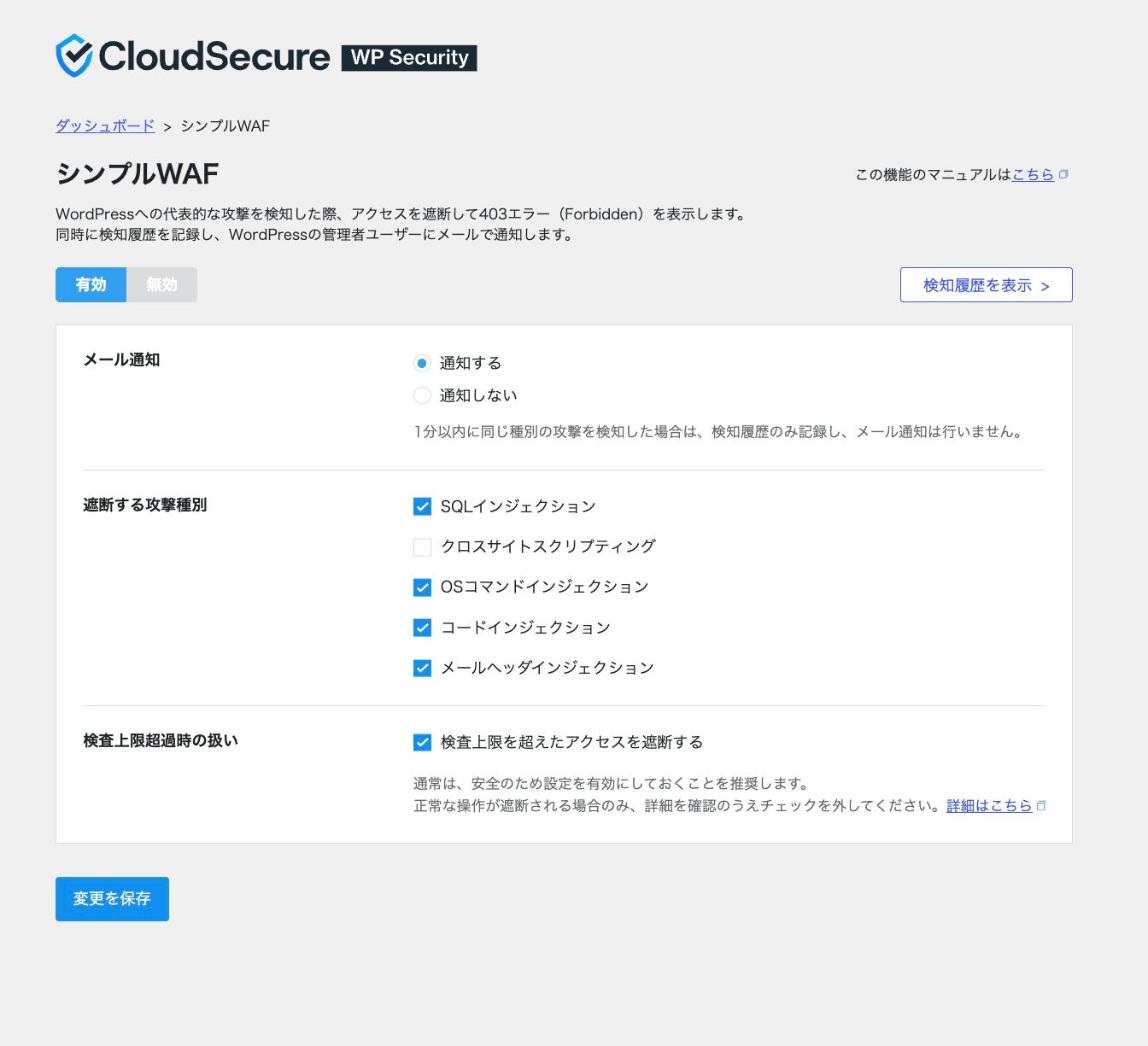
- Email notification: Notify
- Types of attacks to block: SQL injection, OS command injection, code injection, email header injection (Cross-site scripting turned off only)
- Block access that exceeds the inspection limit: On (as recommended)
The reason we only excluded cross-site scripting (XSS) was because there were too many false detections. The site's manual contains a lot of HTML and JavaScript code examples, so saving articles, auto-saving, and saving settings for SEO plugins (all via the REST API) are all considered XSS and are blocked, preventing further editing.
When normal operation stops with WAF, it is recommended to check which rules are responding from the "View Detection History" option and remove only those rules. It is better to leave the defense intact than to disable WAF entirely.
Notice
There are three notification features. The only ones that are turned on on this site are server error notifications.
- Login notification: OffBecause administrators log in and update the system on a daily basis, notifications are buried when emails are delivered each time you log in, making it difficult to notice truly suspicious logins. You can always check your login history on the "Login History" screen.
- Update notification: OffWordPress itself, plugins, and themes are updated regularly while viewing the update display in the administration panel, so it’s reassuring to have them turned on for sites that tend to accumulate updates.
- Server error notification: OnWhen an Internal Server Error occurs, it records the information and notifies you via email. You can detect the problem without waiting for a visitor’s contact.
Points to note
- The settings introduced here are specific to the operation of this site. Security and usability are tradeoffs, so adjust them according to the number of people updating and where the work is done (whether it is a fixed IP address).
- Logout disabling blocks connections based on the IP address of the originating device. If someone using the same line, such as an employee, continues to fail to log in, they may be blocked from accessing the network themselves.
- If there are similar features on the server side (such as XServers' "WordPress Security Settings"), you can use them in conjunction with the plugin. Make sure you understand both settings so that you don't get confused about which one is being used.
- After changing the settings, please make sure that you can perform normal operations such as logging in, saving articles, and submitting the inquiry form without any problems.
Reference:Explains the benefits and how to set up CloudSecure WP Security(Xserver) /CloudSecure WP Security Official Manual